Setup Synology Router Like A Pro
In this modern era, Synology is a renowned brand that offers different networking products. Similarly, the routers of this brand support wifi 6 technology and provide you with safe network access. Likewise, setup Synology router considers an important step to use this networking device to its full extent.
In addition to this, you can either opt for the web GUI or the application procedures to access and customize this networking device. Likewise, if you want to learn more about the configuration of this gateway, then you must read our Synology Router Setup Guide. Here, you find detailed steps for customizing the basic and advanced settings of your router.
What are the quick steps to setup Synology router?
Furthermore, the customization of the Synology networking device is very simple. All you need is to get ready with certain things, such as an active internet connection, valid admin details, a computer/smartphone, a web address, DS Router application, etc. After that, follow the steps mentioned below to learn how to setup a Synology router using a suitable method:
Web Portal
- Initially, link your computer to the Synology router’s network.
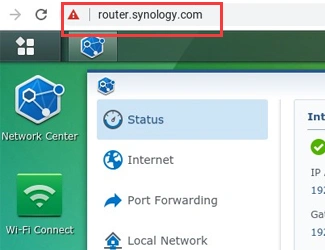
- Next, run the browser on your computer and type router.synology.com or 192.168.1.1 IP address in the URL bar.
- After that, enter the accurate admin username/email and password on the login window.
- Now, you reach the home dashboard of the networking device.
- Here, choose the Operation Mode and tap on Wireless Router.
- Afterward, select the Connection Type (Manual/Automatic IP, PPPoE, DS Lite, etc.)and move forward with setup Synology router process.
- Next, choose the Start Managing Now option, and you are displayed the “Add WiFi Points” if you want to add additional units.
- Moving further, visit the Advanced section to explore and customize the further settings, like Manage Client Devices, Guest Mode, WiFi Connect, etc.
- Follow the on-screen instructions to complete the router setup.
- Finally, click on Apply to implement the recent settings.
- Here, you learn how to setup a Synology router efficiently.
DS Router app
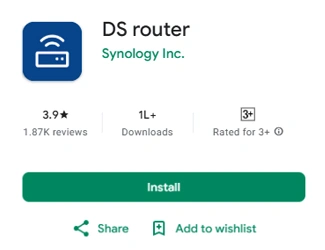
- First & foremost, ensure you have an updated version of the DS Router application on your smartphone.
- Now, connect your smartphone to the Synology router’s network.
- Afterward, activate the app and access the user account by writing in the accurate admin credentials on the login window.
- After logging in, you land on the setup wizard of the router.
- Hereon, you see the set a new wifi name (SSID) and password screen where you need to enter the complex name and security key for your wifi.
- Next to this, select the Operation Mode as Wireless Router and then choose Connection Type.
- Further, allow the permission for the “DS Router wants to join wifi network Synology?” option.
- You see a new alternative here, as “Manage your Synology Router anywhere,” and then tap on the Setup at the screen’s bottom.
- Further, set a “Quick Setup ID” to access and manage your networking device remotely.
- Here, you can add the Synology account admin details or fill in the different information to keep the ID credentials separate.
- Next to this, tap on the Sign up button after entering the accurate information to setup Synology router completely.
- By moving further, you see a new screen, click on the three bars at the top left corner.
- Now, move ahead with the on-screen instructions to customize the additional settings of your Synology router.
- Now, tap on the Apply or Save option to execute the new changes.
- At the end, you are all done with the setup Synology router process.
Wrapping up
In a nutshell, this detailed piece of content provides complete information to setup Synology router without any hassle. Similarly, various methods are discussed here with elaborate steps to complete the router configuration. This post will guide you through the easy configuration of the networking device to enjoy a buffer-free internet and seamless surfing!